Showing posts with label Vegetarian. Show all posts

Sunday, February 26, 2012

Veggie Delight


Lately, I've been making things that are quick, easy, and don't involve a lot of clean-up. I came up with the veggie delight sandwich- totally a knock-off of the subway sandwich, but so much yummier.  I finally had a little down-time over the weekend and decided it was time to get back to blogging with this recipe.

I've been busy with other things too besides work- In November I became the proud owner of my very first Ocarina and my life hasn't been the same since then.

Then the other thing that has been going on is that we've started watching Battlestar Galactica... it is so good we don't want to think that it will ever be over...

But back to the reason why I logged on anyway, the veggie delight... my new favorite sandwich.  It sounds simple and boring, but trust me when I tell you that you won't believe how much taste is packed into this baby.  You should go try this, like right now.

Ingredients:
1 whole wheat baguette
2 tbsp. butter
1 garlic clove, grated
1 large tomato, cut into thin slices
1 red onion cut into thin slices
1 bunch scallions cut into thin rounds
1 1/2 cup broccoli cut into thin slices (with stalks)
1/2 cup sliced button mushrooms
2 tbsp sliced black olives (I usually add this, but was out of them today)
1 jar mild banana peppers (this is really the star of dish)
1/4 cup shredded parmesan cheese
lots of freshly cracked pepper
Olive oil- to drizzle on top at the end
Salt to tase

First, slice the baguette lengthwise.  Grate the garlic into a small bowl or sauce and add the butter.  Melt the butter and let the garlic infuse it.  With a pastry brush, add a thin layer of melted butter to the bread and place on a baking sheet.  Toast in a 400 degree oven until the bread is slightly crunchy.   Remove from the oven.  While the bread is cooking, slice all of the veggies and begin layering on top of the bread, first the tomato, then the mushrooms, then the broccoli, then the onions, then the scallions, then the olives and lastly the banana peppers.  Sprinkle a little Parmesan cheese on top, and season with salt and pepper.  Lastly drizzle a little extra virgin olive oil over the top and eat immediately.

Sunday, November 13, 2011

Sweet Potato Cakes with Black Bean and Corn Salsa


This recipe is quick and great for a party appetizer.  Since sweet potatoes are in season, I had a few on hand and thought I'd use em up.  You could totally make this a vegetarian meal by omitting the turkey bacon.  I love how cute this little appetizer is lol.

For the sweet potato cakes:
2 cups mashed sweet potatoes
2 eggs
1 cups flour
1/2 cup yellow cornmeal
1 tsp. baking powder
4 tbsp. butter
1 green onion stalk, sliced into thin rounds
1 pinch cumin
2 tsp. garlic powder
1 tsp. black pepper
salt to taste

Pre-heat your oven to 375 degrees/ Combine all of the dry ingredients in a bowl.  Next add the mashed sweet potato to a deep mixing bowl.  Next add in the eggs, butter and green onions.  Combine all of the wet ingredients, before adding in the dry ingredients.  Once all of the ingredients are in the same bowl, combine well, making sure to scrape the sides and bottom of the bowl.  Spray a cookie sheet with cooking spray and place a dollop of the mix onto the surface of the cookie sheet- it should look like the size of a lemon (in diameter).  Flatten them down a little with your spatula and bake for 25-30 minutes.

 For the salsa:
1 can black beans, drained
1 cup corn kernels, thawed
5 strips turkey bacon, diced
1/4 cup red onion finely diced
1 tomato cubed
1 stalk  green onion, plus more for garnish
3 garlic cloves, grated
1 tbsp. fresh lime juice
1/8 tsp. cumin
salt to taste

Add the corn, tomatoes, black beans, onions, garlic and green onions into a bowl. Cook the bacon in the oven at 400 degrees until it is crispy.  Slice the bacon into thin pieces and add to the bowl.  Next add in the lime juice, olive oil, black pepper, cumin and salt and combine every thing well.

For the garlicky sauce:
2 tbsp light mayo
2 tbsp. light sour cream
1 garlic clove grated
1 tsp. fresh lime juice
salt to taste

Combine all of the ingredients well.  Making sure to remove any lumps- you want a velvety smooth cream.

Assemble  by placing a sweet potato cake down on a serving dish. Next spoon a dollop of the sauce, followed by a scoop of the salsa.  Garnish with some sliced green onions.

Tuesday, August 30, 2011

Fresh Corn Soup


I made this soup for the first time about a month ago, when I saw that corn on the cob was on sale for 20 cents a piece.  This soup is light yet filling. Paired with a fresh green salad, it makes a lovely weeknight meal. My only gripe is that I made this after dark and the pictures didn't come out that great, but I intend on swapping out the pictures the next time I make this.

Ingredients:
6 cobs of corn (you could use three cups of frozen corn kernels if you're in a hurry)
1 quart chicken stock
1 tbsp. flour
1 small onion
2 tbsp. butter
4 tbsp. cream
1/8 tsp. nutmeg
1/4 tsp. cayenne pepper
Salt to taste

First wrap the corn in foil and bake them in a 375 degree oven for about 45 minutes.  Remove from the oven and let them cool enough for you to handle without burning your hands.  Next remove the kernels of corn from the cob and set aside.  Chop the onion and set aside.  Add the butter to a pot and let it simmer on medium heat until the butter turns slightly brown and nutty.   At this point add in the onions and let them cook until they become tender.  Add the flour to the pot and then add in the chicken stock, corn nutmeg, cayenne pepper and salt. Make sure you taste the soup before adding the salt because the chicken stock also has salt in it.  Whisk vigorously to break up  any clumps of flour that may have formed. It's not a whole lot of flour so it should be fairly easy to incorporate.  Let everything simmer for about 5 minutes before transferring all of the contents of the pot into a blender.  Blend on high speed for about 4 minutes.  It seems like a long time, but blending it well will give you a gloriously velvety soup.  Add all of the contents back to the pot and add in the cream. Stir the soup to combine the cream well and serve hot.

Side note: if you want to make this a vegetarian soup, just swap out the chicken stock with vegetable stock.

Monday, July 25, 2011

Yuquita Frita (Fried Cassava)


I am embarrassed to say that I have only posted one recipe using yuca, and the fact that this blog is called the YUCA Diaries means I need to start adding more yuca recipes pronto!  So this is a simple yuca appetizer or side dish that is probably the counterpart to American French fries. I rarely fry food, but this is one of those occasions where I made an exception. These were served with a garlicky dipping sauce. Without further ado... here is the recipe.

Ingredients:
1 package frozen yuca
6 cups water
2 tsp salt
oil for frying (I use canola)

Add the water , 1 tsp. of salt and frozen yuca to a pressure cooker and cook on medium high for about half an hour or until the yuca is really tender. Dump the yuca into a colander to drain. Set aside to cool a bit.  You'll want to cut the yuca into strips similar to the size of steak fries.   Add oil to a non-stick pan and turn the heat up to medium high.  Once the oil is hot, add the yuca in and let it cook undisturbed until it's golden brown.  Transfer to a cooling rack and season with a little salt.

For the dipping sauce:
1 cup light mayo
1 bunch finely chopped Italian parsley or cilantro (whichever you're in the mood for.  I used parsley this time)
2 large garlic cloves, grated
2 tbsp. water
3 tbsp. fresh lime juice
1/8 tsp. soy sauce
salt to taste

First add the mayo to a mixing bowl. Next grate the garlic and chop the parsley and add it to the bow.  Mix well.  Finally add in the water, lime juice soy sauce, and salt and combine well. Enjoy!

Monday, June 27, 2011

Perfect Home-made Popcorn!


I have said many a time here before how popcorn is my favorite snack.  Popcorn and frozen yogurt actually, I can't quite pick between the two, it really just depends on whether I want something sweet or savory.  Popcorn is one of those things, that no matter how full I am, if I smell it, I want it.  It makes watching movies so much more enjoyable, but after reading an article that named movie-theater popcorn as one of the worst foods of all time, I no longer treat myself to the buttery, crunchy delight.  This inspired me to make  delicious popcorn at home.  Microwave popcorn doesn't even count as far as I'm concerned.  But not all popcorn was created equal either.   There is a right way to enjoy popcorn in my opinion:  using only three ingredients and cooked on the stove.  Something else I'd like to point out is that there are all kinds of gourmet popcorn kernels available- the perfect gift for the popcorn lover in your family.  They range from the whitest of white all the way to  midnight black. Some yield fluffy large kernels and others yield crunchier smaller kernels.  Tastes also range from mild and crisp to nutty and buttery.  Today I'll show two varieties, and my favorite way make home-made popcorn.

The first variety I made was the standard golden Orville Redenbacher popping corn.  The actual corn kernel is large and plump, and has a beautiful golden color.  The popped kernel yields a mild flavor, pops really fluffy and large and has a slight yellowish hue to it.


The second batch I made is known as "black jewel" popcorn.  The description on the site says " black jewel kernels are smaller with a tender hull that shatters when it pops. This means you get fewer hulls in your teeth and gums. Fewer hulls mean black jewel popcorn is also easier to digest than yellow kernel popcorn. Black Jewel is a very flavorful, crunchy textured popcorn that pops snow white with black centers.  I found this description to be very accurate.  I will add that this variety has a much more noticeable "corn" flavor.  After trying them back to back, you realize how mild the standard variety is.  I personally like the black jewel variety better.  Also worth noting, the black jewel produces less volume than the standard yellow.  I had to use twice the amount of kernels to yield the same amount of popped corn that the yellow variety produced.  This is because the black kernel is smaller in size and not as fluffy.

Here is a picture of  the black jewel  kernels when they're un-popped and popped.


Now look at the difference side by-side:


Recipe for my favorite popcorn:

Ingredients:
3  tbsp.  popping corn kernels (double this amount if you're making the black jewel variety)
2 tbsp. coconut oil (not extra virgin or it will impart the coconut taste)
2 tsp. popcorn salt

Add the kernels and oil into a pot with a lid and turn the heat up to medium high.  Leave the lid off until you start to hear a slight sizzle.  Place the lid over the pot and when you hear the first few kernels pop, turn the heat down to medium.  Turn off the heat once you hear the popping slow down a bit- about 1-2 minutes.  Let the pot rest for about one minute before removing the lid.  Transfer the popcorn into a large bowl and sprinkle the popcorn salt over the first few ladle fulls of popcorn.  Continue to add the popcorn to the bowl and season the top with a little more popcorn salt before serving.

Side note: it is very important that you use popcorn salt.  Popcorn salt is just salt that is very fine, but because it is so fine, it sticks to the popcorn.  Regular salt won't stick to the kernel and you'll have bland popcorn. Also. good to know, this popcorn keeps well in a zip lock bag for about a week.  I usually make a big batch and then put them in individual bags to take to work.  I hope you'll enjoy this recipe as much as we do, all in all it is a healthy snack that is full of fiber, whole grains, and gluten free. Plus, your house will smell like the movies for a little while which makes it great for those cozy blockbuster nights with your honey.


Tuesday, April 26, 2011

Mutter Paneer... My Favorite Indian Dish


Mutter Paneer is my favorite Indian Dish. It is from North India and its also vegetarian.  B. and I had it for the first time a few years ago at this great Indian restaurant in Panama City.  It's the best Indian food we've had to date. Paneer is an Indian farmer's cheese, and in this dish, it is cooked in a beautifully spiced sauce with peas.  Simmered to perfection and great for dunking Naan into.   I've seen this dish also made with cottage cheese, but I prefer it with the solid cheese.  It was my first attempt at making this dish and it was really really good.  All I needed was the Mango Lassi to complete the meal.

Ingredients:
2 cups cubed paneer (or solid frying cheese)
1 tbsp. light olive oil
1 large onion, finely chopped
1 tsp. freshly grated ginger
4 garlic cloves, minced or grated
1 tsp. ground turmeric
1 tbsp.  yellow curry powder
1/2 tsp. garam masala
1/2 tsp. cayenne pepper
1/4 tsp. ground cumin
1 small red chili (minced, for a milder version, remove the seeds before chopping)
1 (28 oz.) can crushed tomatoes
1 cup plain yogurt
3 tbsp. cream (light)
1/2 cup frozen peas
1 tbsp. freshly squeezed lemon juice
salt to taste

First begin by cubing the paneer.  In a non-stick skillet, place a little canola oil into the pan and turn the heat up to medium.  Next add in the paneer and begin browning. Turning over once the bottom side is golden brown.  Once all of the cheese is browned, transfer to a holding plate.  Next begin making the paste by adding the grated garlic, ginger, curry powder, garam masala, cumin, turmeric, and  cayenne pepper  into the skillet with a little canola oil.  Let the paste simmer on low heat, while you chop up the onion.  Add in the onion to the skillet and pour in the can of crushed tomatoes to the pan.  Next, add the yogurt, cream,chopped chili and salt and whisk everything to remove any lumps from the yogurt.  Let the sauce simmer for about 15 minutes on low heat.  Add in the lemon juice, frozen peas and the paneer and stir well. Let everything simmer for another 5 minutes and serve.  Garnish with some freshly chopped cilantro.

Side note: In case you're wondering what is in the bowl next to the paneer, it's coleslaw.  I know you may think it is weird, but the sweetness and crunchiness of the coleslaw is so refreshing against the spiciness and creaminess of the curry that they really compliment each other.   All I'm sayin' is don't knock it till you try it.

Wednesday, April 13, 2011

Spicy Schezwan Eggplant


A  few weeks ago, I asked you what veggie you would like to see more of through the Yuca Diaries' facebook page.  There was an overwhelming response for eggplant.  Secretly I was so happy about this, because eggplant happens to be one of my favorite vegetables.  Did you know that in Italy it is known as the "poor man's cutlet"? It is such a versatile veggie. So I embarked on my mission to cook up a tasty eggplant dish, but to my dismay, I went to four different grocery stores only to find out from the produce manager that the crop had been ruined because of bad weather.  I was overjoyed when I found my beloved eggplant about three weeks later.  So without further ado, here is what I made when I finally got my hands on it.

Ingredients:
4 Chinese eggplants
1/4 cup sliced green onions
4 garlic cloves, minced
1″ knob of ginger, minced or grated
1/3 cup canola oil

 For the sauce:
1/4 cup soy sauce
1/3 cup vegetable stock
2 tbsp. duck sauce
2 tbsp. rice vinegar
1 tbsp. chili paste or Asian hot sauce like Sriracha

First slice the eggplant into planks, about 2-1/2 inches long. Add the canola oil to a wok and turn the heat up to high. Add the eggplant in batches. You may have to add a little more oil for the second batch. Saute the eggplant on high heat, stirring occasionally.

Let the eggplant get golden brown on all sides. In a separate bowl, combine the ingredients for the sauce and whisk until you have an even mixture. Mince or grate the garlic and ginger and transfer to the wok with all of the eggplant.

Make sure the heat is set to high and then add in the sauce, tossing everything around really well. Add in half of the green onions and mix well. Reserve the rest of the green onions for the garnish.

Serve with steamed rice.

Monday, February 28, 2011

Sweet Tamale Cakes


Have you ever been to a restaurant and ordered something you loved and thought to yourself, '"I bet I can make this at home"?  One of the dishes I've been meaning to try my hand at is the Sweet Corn Tamale Cake from Cheesecake Factory.  I finally got around to making these this weekend and thought they came out EXACTLY like the real thing.  This was probably the closest I've ever come to recreating a restaurant dish at home.  I looked online for a few recipes and modified one that I thought sounded like it would turn out well, and I was not let down.  All in all, it was a pretty simple dish, but a little tedious since you have to make three separate sauces.  Totally worth the effort in my opinion.

For the Tomatillo Salsa:
4 tomatillos, diced
2 tbsp. green bell pepper, minced
2 green onion stalks, minced
2 tablespoons fresh cilantro, minced
1  tsp. granulated sugar
1/4 teaspoon ground cumin
1/4 teaspoon salt

Chop up the tomatillo, pepper, green onion and cilantro.   Dump all of the ingredients into a food processor and gently pulse to get a smoother consistency.  Place the contents into a bowl and begin adding cumin, sugar and salt.   Stir well, cover with plastic wrap and place the bowl in the fridge to chill until you're ready to assemble the cakes.

For the Pico de Gallo:
2 medium tomatoes, diced
1 tbsp. minced Spanish onions
1 tbsp. fresh cilantro, minced
1 tsp. fresh lime juice
1 tbsp. green bell pepper or mild chili like pasilla, seeds removed and minced
1 tsp. salt
1 tsp. light olive oil

Dice up the tomatoes and add to a small bowl.  Mince the onions and peppers and add to the bowl.  Next, finely chop the cilantro and add to the bowl along with the rest of the ingredients.  Stir well, cover with plastic wrap and place in the fridge to cool until you're ready to assemble the dish.

For Southwestern Sauce:
1/2 cup mayonnaise (I used light)
2 tbsp. ketchup
1 tsp. white vinegar
1 tsp.water
1 tsp.  granulated sugar
1/2 tsp. chili powder
1 tsp. paprika
1/2 tsp. cayenne pepper
1 garlic clove, grated
1/2 tsp.  salt

Add the mayo, ketchup, water and vinegar to a bowl.  Whisk well to combine the sauces and remove any lumps.  Next add in the paprika, cayenne powder, chili powder, salt and garlic clove and whisk to combine all of the ingredients. Cover and put in the fridge to chill.

 For  the Cakes:
3 cups frozen sweet corn
1 1/2 sticks butter, melted
2 tbsp. water
6 tbsp. sugar
2 tsp. salt
1 cup corn flour (masa harina)
1/4 cup regular flour

Start out by pre-heating your oven to 400 degrees.  Thaw out  the corn kernels.  They don't have to be completely thawed, just tender enough to where they'll blend in the food processor.  Add the corn and the water to a food processor and pulse until you have a coarse chop.  Transfer the corn to a large mixing bowl and add in the butter.  Blend well with a spatula.  Next add in the corn flour and the regular flour, the salt and sugar and blend well.  You should have a sticky consistency.  If it feels too dry, add a little water.  Spray a non-stick cookie sheet with cooking spray and begin forming the cakes.  You should have a  shape similar to a crab cake.  Place the cakes down on the cookie sheet.  Bake for 15 minutes and remove the tray from the oven to flip the cakes.  Bake for another 10-15 minutes.

For the Garnish:
1 hass avocado
6 tbsp. sour cream
3 tbsp. finely chopped cilantro


To Assemble:
Spoon the tomatillo salsa along the bottom of your serving platter.  Place the cakes over the tomatillo salsa and then top with the pico de gallo.  Next drizzle a little of the southwestern sauce over the top of the cake.  Cut the avocado into small chunks and place on top of the cakes.  Dollop one tbsp. over each of the cakes and sprinkle the top with some fresh chopped cilantro.


Wednesday, February 9, 2011

Zucchini Carpaccio


You know what I love about this dish? The texture of the super ultra thin zucchini and onions and the tang of the lemon juice.  I love how simple this dish is too. Not too much going on and the vegetable is the star of the show here.  The next time you want to make an elegant appetizer that is also healthy, this is an excellent option.

Ingredients:
1 large zucchini
1/4  of a small onion
1 tbsp. olive oil
1 tbsp. capers
juice of about half a lemon
lots of fresh cracked pepper and a little sea salt

Wash the zucchini well and dry it.  Using a mandolin, begin thinly slicing the zucchini.  Assemble the zucchini on a platter gently laying one slice over the other, overlapping the zucchini in a pretty pattern.  Slice the onion into really really thin slices and sprinkle over the zucchini.  Next sprinkle the capers over the platter.  Drizzle with a little extra virgin olive oil, squeeze a little lemon juice over the top and season everything with some fresh cracked pepper and sea salt. Voila... there you have a beautifully appetizing dish that took about 10 minutes to make.

Also, I noticed when I was looking at the shots, that in the picture below, it looks like there is a sad zucchini face.


Saturday, January 15, 2011

Curried Lentils with Roasted Sweet Potatoes


This past Friday, my husband. had a pretty traumatic experience at the dentists' office.  They were working on a tooth, and discovered that a simple filling wouldn't do, but that he needed a root canal.  5 pricks to the gums, and three hours of prodding with metal picks and drills later, he was in a fragile state to say the least.  The worst part is that they couldn't finish in one swoop.  He's scheduled back for round two next Friday. Any who, he needs to eat soft meals because he has some soreness and pain.  I pureed this dish for him and he was able to eat it without a problem.  Plus it has a ton of sustenance- the lentils are packed with protein and fiber, the sweet potatoes are filled with beta carotene and a great source of vitamin c.  Also, the turmeric in some curry powders is also an anti-inflammatory- perfect for his current condition. Oh yeah, this is also a vegetarian dish too that's loaded with tons of veggies.  Hurray for veggies in our diet!

Ingredients:
1 bag brown lentils
6 cups vegetable or chicken stock
1 large onion
6 garlic cloves
1/2 a small red pepper
2 celery stalks
2 sprigs fresh thyme
1 bay leaf
2 tbsp. curry powder
1 tbsp. sweet smoked paprika
1 lemon (juiced)
4 tbsp. olive oil (plus more for drizzling over at the end)
1 bunch green onions
2 cups fresh chopped spinach
2 large sweet potatoes
1 tbsp. honey
salt to taste

Pre-heat your oven to 400 degrees.  Peel the sweet potatoes and cube them into large chunks.  Place the pieces on a non-stick baking sheet and  drizzle them with two of the tablespoons of olive oil.  Coat the sweet potato chunks with the oil and bake in the oven until they're tender and begin browning a bit.  While the sweet potatoes are baking, begin making the lentils.  Wash the lentils well under running water and drain.  Transfer them to a pressure cooker with the vegetable or chicken stock and sprigs of thyme.  Let the lentils cook on medium-heat high heat until they're tender, about 25 minutes.   While the they cook, begin finely chopping the onion, celery, red pepper, and the garlic, reserving two garlic cloves for later.  Add two tbsp. of olive oil to a non-stick pot, turn up the heat to medium-high and transfer the the onions, garlic, celery and bay leaf to the pot.  Saute until the veggies become tender.  Add the curry powder and paprika to the vegetables and blend well.  The lentils should be getting close to done by now.  Once they're tender transfer them into the pot with the onions, garlic, celery and spices.  Add salt and taste to make sure they're seasoned to your liking.  Now would be a good time to gauge if you'd like more curry flavor to the dish too.  Blend everything well.   Chop the spinach and green onions and transfer into the lentils.  Squeeze the lemon juice, and add the honey and grate the remaining garlic cloves into the lentils and combine really well.  Check on the sweet potatoes and remove once they're nice and golden brown on the outside and soft and tender on the inside.  Serve the lentils into a bowl, top with some roasted sweet potatoes and drizzle lightly with extra virgin olive oil.

Tuesday, January 11, 2011

Easy Parmesan Veggie Dip


Ingredients:
2 tbsp. butter
1/4 cup flour
2 cups roughly chopped spinach
1 cup shredded carrots (I used a julienne tool, but a box grate would work too)
1 cup broccoli florets cut into small pieces
4 garlic cloves
1/2 tsp. grated nutmeg
1 tbsp. dry white wine like sherry
1/3 cup shredded mozzarella cheese
1/3 cup grated Parmesan cheese
1/2 cup chicken or vegetable stock
1/3 cup half &half

The first thing to do is to wash your veggies and cut them up as directed in the ingredient list and set aside.  Begin to melt the butter in a non-stick pan and add the flour once it's melted to make a roux.  Next add the chicken stock and half and half, and wine and blend well, making sure to dissolve the flour into the liquid.  Grate the garlic and add it into the sauce along with the nutmeg and salt, making sure to combine well.  Add in the cheeses and allow them to melt.  Using a spatula, stir this mixture to make sure the cheese is well incorporated before tossing in the veggies.  Coat all the veggies with the sauce and allow them to cook until they're tender but still retain a bit of their bite.  Transfer to a serving dish and serve with crusty garlic bread or crudites.

Monday, December 20, 2010

Roasted Tomato Tart


This tart is really quite simply to make and will wow your guests.  The only stipulation is that you have to use good juicy and ripe tomatoes... mealy tasteless tomatoes won't work at all.

Ingredients for the crust:
2 cup unbleached all purpose flour
1 tbsp sugar
1 tsp salt
8 tbs butter, chopped into small squares
1/3  cup ice water (plus more if needed)
1/2 cup  grated Parmesan cheese

Process the flour, sugar and salt in a food processor until combined. Cut the butter into squares and add to the food processor along with the Parmesan cheese and pulse until you have coarse crumbles. Add 4 Tbs of ice water and pulse the mixture until the dough begins to come together, adding more water as needed. It's okay if you have visible pieces of butter throughout the dough, this will yield a flaky crust.

Press the dough into the bottom of a tart pan with a removable bottom. Press the dough up the sides about two-thirds of the way up.  Even out the dough well,  smoothing over any uneven pieces.  Cover with plastic wrap and put it in the fridge for about 45 minutes or until it is firm.

Preheat oven to 350 degrees. Remove the plastic wrap and place the tart pan over a cookie sheet.  Cover the crust with foil and place pie weights or dry beans on top of the foil to keep the crust from rising.  Bake for 30 minutes and remove from the oven.

For the filling:
1 cup part skim ricotta cheese
1 garlic clove, grated
zest of 1 lemon
1 tbsp. fresh chopped oregano
1 tsbp. fresh chopped parsley
1 tbsp lemon juice
1 tsp. dried oregano
1/3 cup shredded Parmesan

Add the ricotta cheese to  the food processor and blend on high speed until you have a much smoother consistency- about 2 minutes.  Next grate the garlic clove  and add to the food processor along with the lemon juice.  Transfer the mixture to a mixing bowl and add the herbs, Parmesan cheese, salt and lemon zest. Once the mixture is blended well, spread this mixture evenly over the tart crust.

For the toppings:
3 large ripe tomatoes
1 onion
1 tsp. dried oregano
1/4 cup mozzarella cheese

Raise the oven temperature to 425 degrees. Slice the tomatoes into rounds and arrange on top of the ricotta mixture.  Slice the onion and arrange on top and in between the tomato slices.  Sprinkle the top of the tart with mozzarella cheese and the dried oregano.   Transfer to the oven and bake for about 15 minutes.  Gently remove the bottom of the pan and transfer the tart to a serving platter.

Tuesday, August 31, 2010

Authetic Cuban Black Beans


I have posted a shortcut version to Cuban black beans here before, but I thought I'd also post the real way my mom and grandma have made black beans for years.  Let me just state that black beans are one of, if not the most important or common dishes in Cuban cuisine. We serve them over rice, eat them alone, cook them into the rice to make "moros"- another typical Cuban side dish.   Black beans are served from parties to weekday dinners, and are always a welcomed addition to any meal.  There are tons of recipes for black beans, but I tend to be a bit of a purist when it comes to the ingredient list.  I think the flavor of the beans when you're not using the canned variety really lends a totally different taste that doesn't need much "help" as opposed to the doctored up version I've posted here before.  Some people add vinegar, or bay leaves or even olives which I add to my shortcut version, but for my family's traditional recipe I omit all three. In the picture above there is a really typical side dish called "tostones" which is made with green plantains.  I will post that recipe next.

Ingredients:
1 package dried black beans
water (for soaking the beans and later cooking them)
2 onions
2 green peppers
1 red pepper
5 garlic cloves
3 tbsp olive oil
salt to taste

The first thing you do is open the package of beans and dump it into a fine meshed sieve to rinse them, and remove any little particles like twigs or rocks.  Then put the beans into a bowl and cover with water.  Let the beans soak for about 2 hours.  If you're not using a pressure cooker, you'll have to let the beans soak overnight.  I used a pressure cooker and it cut my cooking time dramatically.   Once you're ready to cook the beans, add them to the pot along with the water they were soaking in. Make sure that you have enough water in the pot to cover the beans and come up about 2 inches from the beans.  Next remove the outer layer of an onion and cut it in half.  Add that to the pot along with one green pepper (seeds removed) and 2 cloves of garlic.  Place the lid on the pressure cooker an cook until the beans are soft and tender- about 30 minutes in the pressure cooker or 2 hours in a regular pot.  Once the beans are tender, remove the onion, pepper and garlic and take some of the liquid from the beans and add to a blender. Add 2 raw garlic cloves to the blender and whizz it around until you have a smooth puree. Add it back to the pot with the beans. This would be a good time to add salt to the beans.


Now we begin to build the aromatics for the beans.  A trick my mom showed me was to add a roasted green pepper.  The way to do this is by simply putting the pepper on the burner and allowing it to roast.  Really, it's more like a char, but you get the idea.  You can also broil them like the Pioneer Woman does. Once you have a nice char throughout, cut the pepper in half and put it in a zip lock bag.  The steaming action that forms in there will make it much easier to peel the skin.  After about 15 minutes, remove the black skin to reveal the smooth layer underneath, and add the pepper to the pot.


Next dice up the other onion, red pepper and green pepper and saute olive oil until nice and tender.   Add this to the blender taking a little more liquid from the beans and adding the remaining garlic cloves and pureeing. Add the puree back into the pot with the beans and stir to combine everything really well.  Taste to make sure it's seasoned to your taste and allow for the liquid to thicken up by simmering lightly for about 20 minutes uncovered.  Drizzle a little extra virgin olive oil over the top before serving.

Wednesday, August 11, 2010

Vietnamese Spring Rolls with Spicy Peanut Sauce


My mom asked me to make the lettuce wraps I recently posted, so I decided to make an Asian inspired meal.  In addition to the lettuce wraps, I made jasmine fried rice, Veggie egg rolls, and these lighter and healthier Vietnamese style spring rolls.  Like a doofus, I forgot to take a picture of the dipping sauce, but I included the recipe below as well.  Enjoy!


For the spring rolls:
1 cup thinly sliced red cabbage
1 cup thinly sliced green cabbage
1/2 cup thinly julienned carrots
1/2 cup thinly sliced red bell pepper
1/3 cup thinly sliced scallions
1 package rice paper
2 cups rice noodles (i like thin noodles like vermicelli- make sure to use rice noodles!)

Slice all of your veggies and set aside.  Next add about 5 cups of water to a pot and bring to a boil.  Break the rice noodles in half before adding to the pot.  Stir to make sure the noodles don't clump together.  After the noodles are cooked, drain them and add to a bowl of ice and water to shock them , and cool them before putting them in the roll. If the noodles are too hot, they'll wilt the veggies and the beauty of these spring rolls is how fresh and crunchy the veggies are.  Once the noodles are cold, drain them and set them aside.  Now we're ready to begin assembling the rolls.  Take a bowl and add warm/hot water to it.  Make sure the rice paper fits completely into the bowl you use.  Take a piece of rice paper and soak it for 5 seconds.  Transfer to a flat surface and place a mixture of each veggie in the center of the wrap, as well as some noodles.  Fold in the two vertical sides and then roll the  wrap horizontally.  Make sure you have a tight roll, otherwise all of the ingredients will fall out.  It's the same concept as folding a burrito.

For the spicy peanut sauce:
1/2 cup peanut butter
1 tbsp freshly grated ginger
2 tbsp. brown sugar
1/2 cup hoisin sauce
2 tbsp. soy sauce
1 garlic clove grated
1/4 tsp. Sriracha
1 cup boiling water

Add all of the ingredients to a blender and zip until the mixture is smooth and creamy.

Tuesday, July 27, 2010

Meatless Monday…Char-grilled Veggies and Black Beans


I am not vegan, although we did try that a few years ago and did it for about 6 months.  Every now and then its nice to eat a meal with no meat, or cheese or animal products.  Last night's menu consisted of grilled eggplant, grilled zucchini, grilled onions, Cuban black beans, white rice, and garlic lime Mojo sauce.   I am a fan of Michael Pollan and his Mantra: " Eat food. Not too much. Mostly Plants".  I have not enjoyed a meal as much as this one in a long time.  It really was very very basic.  The veggies were grilled only sprinkled with Himalayan salt.  I could have eaten the grilled onions alone as a meal... I couldn't believe how much flavor the veggies had without really anything added except salt. I will be making this meal again very soon.

For the veggies:
1 Japanese eggplant
1 large zucchini
2 large onions
salt to taste

Take the eggplant and slice into three sections. Begin slicing lengthwise to create planks- about 1/4" thick.  Slice the zucchini into 1/4" rounds.  Lastly slice the onion removing the outer tough skin.  Make sure to slice the onion into rounds without separating them.  You should have discs of onions that are still intact.  Take a grill pan and put it on the stove, setting the heat to high. Do not add oil or anything. If you absolutely have to, spray a little PAM, but really it's not necessary.  Lay the pieces of eggplant on the pan and allow for them to cook until you get nice grill marks. Season the top side of the eggplant with a little salt. Flip and cook on the other side until you get grill marks on each side. Remove from the pan and do the same thing the zucchini and onions.  It's important that you let the veggies cook undisturbed.  If you start flipping them around too much then the veggies will stick and not caramelize like it's supposed to.

I served this with doctored up Cuban style black beans.  Because this was a veggie heavy meal, I really bumped up the onions and peppers I added to the dish. I've posted this recipe before but for convenience's sake, here it is again.

For the doctored up Cuban style black beans:
2 cans black beans
1/3 cup water
1 tsp. vinegar
2 bay leaves
1/3 cup finely diced green pepper
1/3 cup finely diced red pepper
1 large onion finely diced
4 large clove of garlic
3 tsp. extra virgin olive oil
salt to taste

Finely dice the peppers, onion and garlic and sauté with olive oil in a pot. Once this mix has become tender, add the cans of black beans and water. Add the bay leaves and vinegar, allowing the beans to simmer over med-low heat for 20 minutes. Remove the bay leaves before serving.

In Cuban cuisine, mojo sauce (pronounced Mo-ho) is a staple.  It's used to pour over yuca, as a condiment or to marinate meats.  I drizzled a little of this over the veggies and added to the beans for extra umph.

For the mojo sauce:
2 limes (juice only)
4 large garlic cloves
1/3 cup  light olive oil
pinch of salt

Grate the garlic and add to a bowl.  Squeeze the lime juice into the bowl and add the oil.  Using a whisk, blend vigorously until it's slightly emulsified.  Make sure to stir before spooning over your food.

Thursday, May 6, 2010

Lentil-Ricotta Meatballs


I know what you're thinking... lentil meatballs??!   I know it was my same reaction too, but I stumbled across this recipe from "In Jennie's Kitchen" and thought I had to try it.  For one, lentils are packed with Fiber and Iron, and really really cheap. The meatballs looked exactly like a real meatball would.  They tasted really good too. I adapted the recipe a tiny little bit, but really followed the original closely.  I think you could basically just make the meatballs the same way you would a regular meat one. So if you have a meatball recipe you like just try subbing the meat for the lentils.   They don't quite taste like meat, but they are still tasty and a different take on the classic version.   Here's the recipe.

Ingredients:
1 package lentils (roughly two cups cooked, pureed)
1 cup ricotta cheese
2 eggs
1 tsp. dried oregano
1 tbsp. fresh basil
2 tbsp. fresh parsley
3 large garlic cloves, grated
3/4 cup bread crumbs
4 tbsp. grated Parmesan cheese
Salt and pepper to taste

Pre-heat your oven to 350 degrees. Cook the lentils in water until they're tender- the water should be about 1/2" above the lentils.  Run through the food processor until you have a thick paste.  Transfer the lentils to a bowl and add the ricotta cheese.  Combine well.  Finely chop the herbs and add to the lentils. Crack in the eggs, blend them in.  Next add the bread crumbs, salt and pepper and Parmesan cheese.  Begin forming the meat balls.  Line a cookie sheet with foil and drizzle a little olive oil on it- enough to coat the bottom. Place the meatballs onto the cookie sheet and bake until they're nice and browned on all sides.  You'll have to turn them occasionally to get them evenly browned.   Serve with marinara and pasta, or as a sub, or with a spinach salad which is how we ate them.

Monday, May 3, 2010

Simple Summer Sandwich


Sometimes the most delicious meals consist of only a few ingredients and not very much time to prepare.  I remember sitting in my grandparent’s kitchen eating this with my best friend, grandma and grandpa.  "Pan con tomate" (bread with tomatoes) is still one of my favorite things to eat.  I jazzed this version up by adding sliced avocado, but it's just as good with just tomatoes- in fact, that's how I usually eat this, but had a few avocados that were going to spoil if not eaten.  The only kicker with this meal is that the tomatoes have to be good... no mealy, tasteless tomatoes allowed!

Ingredients:
4 slices bread (you can use any you like including gluten free)
3 large ripe tomatoes (green tomatoes are lovely in this too)
1 sliced avocado
1 small red onion
2 tbsp extra virgin olive oil
Pinch of garlic powder
Sea salt to taste

First drizzle the bread with a little olive oil and toast until the bread is crunchy.  While the bread is toasting, start slicing the tomatoes.  Now would be a good time to sharpen your knife... I personally like paper-thin tomato slices and to achieve that goal, you need a really sharp knife.  Put the tomatoes in a bowl and season with sea salt and olive oil.  Slice the avocado and onions.   Then just assemble each toast.  I started with the tomatoes, then avocado, then onions, drizzled with olive oil and sprinkled with sea salt and garlic powder.   My mouth is watering... especially since I am NOT feeling my peanut butter and jelly sandwich I brought for lunch today.  Oh well there's always dinner right?

Wednesday, October 28, 2009

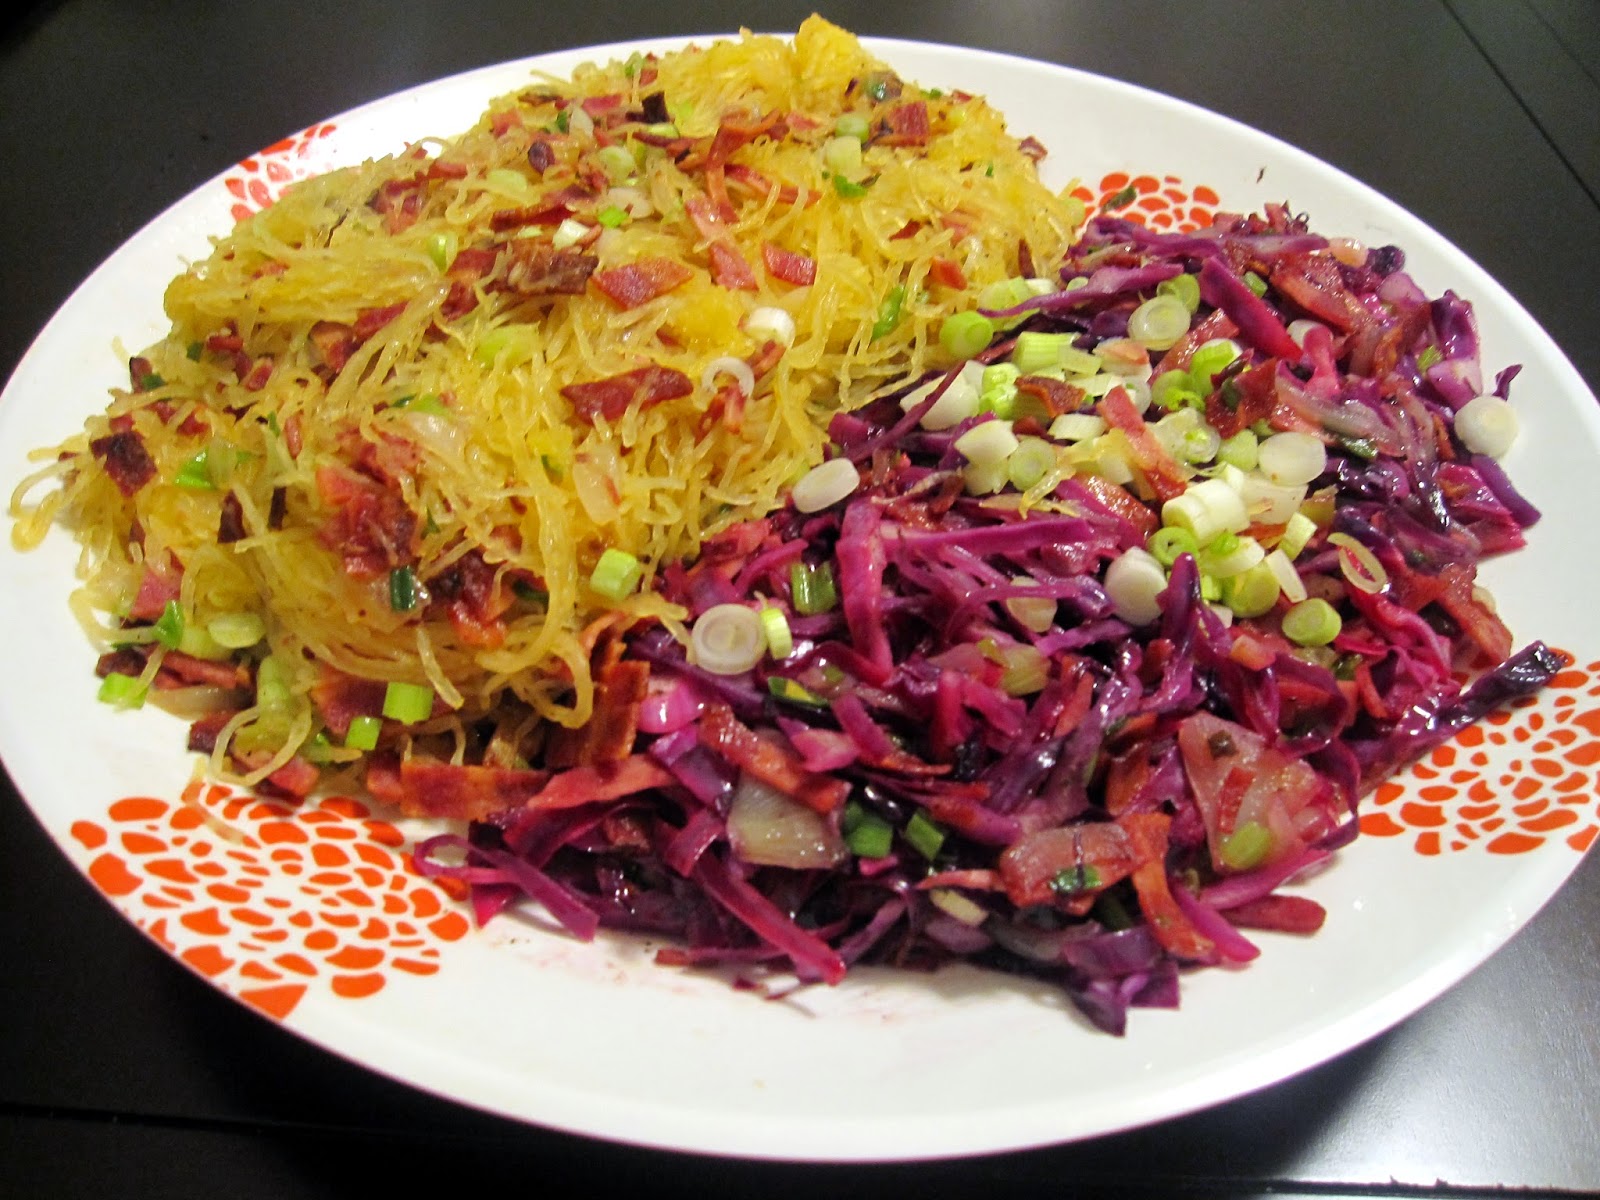
Sauteed Spaghetti Squash and Cabbage with Bacon and Onion


Finding new ways to eat vegetables for many people can be quite challenging. Eating vegetables as your main meal is really under-rated too. I have been trying to cut out the refined carbs and sugars from our diet and incorporate more veggies with our meals. So far so good I must say. I prepared a spaghetti squash dish and a purple cabbage (I made the cabbage because my husband is not a fan of squash at all) dish that was delicious and perfect for those watching their figure. They were pretty much the same recipe I just switched out the cabbage and squash for both dishes.

Spaghetti Squash/Cabbage
1 small spaghetti squash and or 1/2 head of purple cabbage
1 onion
2 tbsp. butter or olive oil
3 garlic cloves
4 green onion stalks
1 package turkey bacon (you can use veggie bacon if you want to make this meal vegetarian)
1 lemon (juice and zest)
1/2 tsp. nutmeg
salt and pepper to taste

If you're making the squash the first thing to do is pre-heat the oven to 400 degrees. Then you'll cut the squash in half, remove the seeds and the gooey stringy parts, season with sea salt and put on a roasting pan. Transfer to the oven and allow it to cook through. Next take a foil-lined cookie sheet, spray it with cooking spray and lay the turkey bacon strips on the pan. Also put this in the oven. You might have to do this in two batches because I don't think one package of bacon will fit on one pan. While the bacon and squash are cooking, begin dicing your onion and mincing the garlic. Using a large skillet or wok, add the butter or oil and allow it to get hot. Transfer the onions and garlic to the pan and begin to sauté.

Once the onions are cooked through, remove from the heat. By now your bacon should be done. Remove the strips from the cookie sheet and transfer to your cutting board. Chop it up into bite-size pieces. Take the squash out of the oven and using a fork, begin to "rake" up the strings, transferring it to the pan with the onions and garlic. Combine well and add the turkey bacon. Now would be a good time to add the nutmeg, salt and pepper. Allow the dish to simmer for a few minutes on med. heat. While that's going on, zest a lemon, and juice. Add the zest and juice to the pan and incorporate well. Lastly, slice the green onions and combine with the rest of the ingredients, reserving a handful to garnish. If you were feeling adventurous you could add capers, or mushrooms to this dish- I would have but didn't think of it until after the dish was done.

If you were making this with cabbage, all you would do is slice the cabbage so that it kind of looks shredded, and sauté after cooking the onions and garlic. You would make the dish the same way as the squash from this point forward.

Friday, July 10, 2009

Veggie Frittata, Turkey Sausage, Turkey Bacon and Home Fries

 
Fritattas are a good breakfast to make on a weekend. They're easy to make and you can make a lot of it or a little depending on the number you're serving without doing any extra work. They're also a good way to get some veggies into your diet- I made this one out of veggies and it was delicious. I served it with some home fries and some lean turkey sausage and bacon to complete the meal. We didn't eat again until dinner!


Veggie Frittata:
6 eggs
1 small onion
1 bag spinach
1/2 a red pepper
3/4 cup shredded cheddar jack cheese
salt and pepper to taste

Dice all of the veggies and saute them until they're tender. Remove and set aside. In a large bowl, whisk in the eggs, veggies cheese and salt and pepper and pour into an oven-safe pan sprayed with cooking spray. Cook on low heat until the frittata is almost cooked through. At this point, put it into the oven and cook at 350 degrees for about 15 minutes.


For the Home Fries:
2 large russett potatoes
1 onion
1/3 cup parsley
2 tsp. paprika
1/4 cup Parmesan cheese
olive oil- to drizzle over the top
Salt and pepper to taste

Slice the potatoes into rounds ( I used a sharp knife but a mandolin works well too.) Make sure the slices are even. Next dice the onion and mix with the potatoes. Take a foil-lined cookie sheet and spray with cooking spray. Add the potatoes and onion to the pan and season with the paprika, salt and pepper and drizzle with olive oil. Cover with foil and bake for about 20 minutes at 400 degrees. Remove the pan from the oven and take off the foil. The potatoes should be tender now. Add the cheese and parsley and combine well. Allow the potatoes to cook uncovered until they're slightly crisp.

Friday, July 3, 2009

Three Burglars and a Pizza


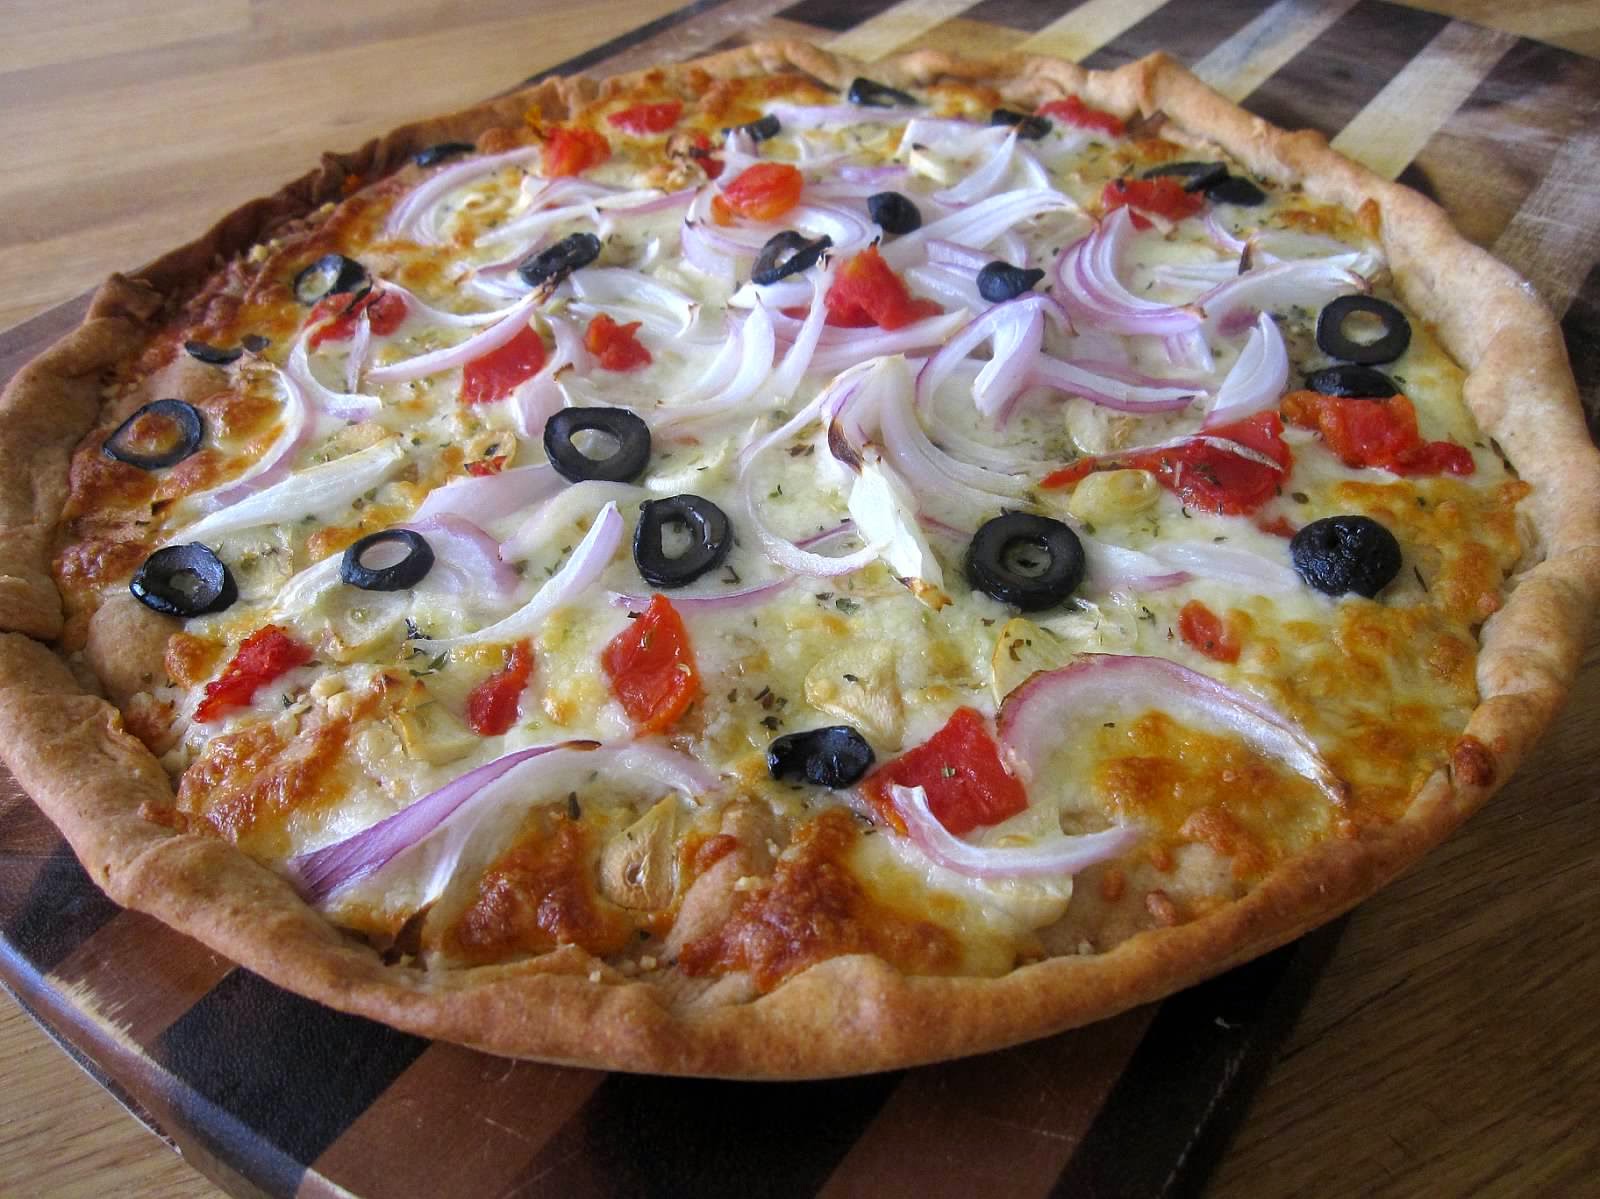
I have not posted anything in such a long time. My mom arrived last Wednesday from Miami. Although I am thrilled she's here, it has not been a good week. The day after she arrived, three burglars came into the house and had a gun. My mom was home alone and heard a really loud noise from the back of the house. She went to investigate and was met with a pointed gun and three delinquents. Thankfully my mom started screaming like a mad woman and they left before doing any damage- other than leaving her seriously shaken, and breaking the lock and patio door frame. Several trips to home depot, about 6 hours of paid labor to fix the door, and a bill of about $650.00 everything is back to normal. About 3 days after that, I came down with the most awful flu I can remember having in a LONG time. I started feeling sick on Monday night and today is Friday and I am still feeling sick. My week has been filled with rising and falling temperatures, horrible headaches and the most painful sore throat I ever had. I went to the Doc. and she told me it wasn't strep so I guess that was the silver lining. Why am I posting all of this you ask? Well, the truth is that I had been on a food blogging kick. I was posting a lot more frequently and really enjoying it. I kind of feel bad that I've fallen of the blogging wagon (and shhhhh- the workout wagon went to hell too). Here is my feeble attempt at a come-back. I hope you guys enjoy this! Who could turn down a piece of home-made pizza?


Pizza Dough Ingredients:
3 cups all purpose unbleached flour
3 cups whole wheat flour
2 tbsp sugar
1 tbsp. salt
1 tbsp garlic powder
2 2/3 cups water
1/4 cup canola oil
2 tsp baking powder
1 packet active dry yeast
1 1/2 tbsp. cornmeal

Add the ingredients to your bread machine according to manufacturer's instructions. Mine said to add all of the wet ingredients first then add the dry ingredients(with the exception of the cornmeal- that's for later). Preheat the oven to 375 degrees. I turned the bread machine on to the the dough setting and let it do its thing. The pizzas I made had a really thin crust. To achieve this, roll out the dough till it is about 1/8" thick- make sure to flour your surface and your rolling pin so that the dough does not stick. Next take your pizza pan and add a little canola oil to the bottom. With a pastry brush, make sure to get all of the bottom of the pan coated. Take the cornmeal and sprinkle evenly over the pan. After that, take your pizza crust and drape over your pan. When you roll it out, you want to try and roll it into a similar shape of the pan you're using, leaving about a 1/4" overlap so you can create a crust. Once you position the dough in the pan, fold the edges over and lightly pinch to secure. Take your silicone brush and spread an even layer of olive oil over the top. At this point you're ready to bake it in the oven for about 8 minutes. Remove from the oven to begin adding your toppings.

Toppings For pizza #1
2 hand fulls mozzarella cheese
1 handful shredded (not grated) Parmesan cheese
1 small white onion
6 cloves garlic
extra virgin olive oil


Topping For Pizza #2
2 hand fulls mozzarella cheese
1 handful shredded (not grated) Parmesan cheese
1 small red onion
1 ripe tomato, diced
6 black olives, sliced
1 tsp. dried oregano
extra virgin olive oil

While your dough is pre-baking, you can begin to cut up your toppings. This pizza was not your traditional one since I did not include a sauce. I added a little olive oil after removing the pan from the oven. I made two varieties, one with just cheese, garlic and onions. The other had red onion, garlic, tomatoes and olives. After you assemble each pizza, drizzle with some olive oil and bake until the crust is somewhat crispy and the cheese is bubbling.


Back to Top